Saturday, November 3, 2012

Journaling on the go...

Hey there everyone!  I had to go on the road for work last week, so I made up an art journaling travel kit, and did my Book of Days page in my hotel room.  It worked out great!  I was inspired by this video from Gina Armfield, so I decided to make something similar, only with supplies to fit my own style of journaling.  Here's what I came up with...

 There are three pouches: one for pens and markers, one for paper, and one for everything else...


I bought two of the same type of papaya art pouches that Gina uses.  They are GORGEOUS and made of a really nice oil-cloth material that is super sturdy. (I can't link you to papaya art right now - there site seems to be down)

Here's a peek of what's inside...
  

and here's a more detailed look at the contents of each pouch...
 
 The little one is jammed with all sorts of pens and markers.  I also put in a small ruler, mini staples a tiny tin of alphas and a pencil. I wouldn't need this many pens, but I'm a bit obsessed - ha.  My essential journaling pens include

Manga Set of Pitt Pens,
Sharpie Poster Paint Pens in black and white
Uniball Signo in White
and my favorite journaling pen - the Pilot Permaball

The rest are just miscellaneous markers that I threw in there.

 The next pouch is filled with papers...

The papers fall into four categories...

Backgrounds (Bits of Scrapbook papers)
Text/Ledger (dictionary paper, vintage ledger, old forms, etc.)
Specialty (tissue paper, wallpaper, transparencies, napkins, etc), and
Images (magazine images, postcards, greeting cards, vintage photos, etc.)

I also have some rub-ons and mini alphas in this pouch.


The third and final pouch has all of the other stuff...
This includes...

Acrylic paint
credit card (for spreading paint)
mini mister
foam brush
paintbrush
waterbrush
10 of my favorite neocolor II crayons
china marker
small scissors
popsicle stick (for applying rub-ons)
a variety of decorative tape (washi, fabric, paper, gaffer)
an eraser and pencil sharpener
baby wipes
paper towels
waxed paper (for layering under your page for protection)
an acrylic block and small acrylic alphabet set
tiny rubber alphabet stamp set
black stazon (permanent) ink
small stencil
adhesive: scrapbook tape, tape runner, gluestick and wet glue
small containers - one of gesso and one of gel medium


Look how nicely they fit in my small overnight suitcase...
I also brought a rolled-up craft sheet (to protect the hotel room table) and 3 magazines.  Two for images, and an extra old one for gluing on.

It worked GREAT and was really a nice way to relax in the evening!

Here's the page I created in the hotel room...


The layers include:
gesso
acrylic paint
collage papers
rub-ons
ledger paper bits
more acrylic paint
cat image, title (Late Night Thoughts), and the quote, which was cut from a greeting card.


Thursday, November 1, 2012

Mixed Emotions Art Journaling Workshop is coming...!!!

Hi everyone!  I'm super-excited to announce....


Art journaling focuses on putting your personal thoughts and emotions on paper - and you don’t always have to use words to do that! Even if you're not a writer you can create meaningful art journal pages; because an emotion can be expressed through a photograph, a color, a material or a particular technique. 

In this workshop we will explore one specific emotion each lesson; and take that emotion as the basis to create a personal art journal page. What does each specific emotion mean to you? You are encouraged to explore your inner world and your perception of your emotions and turn them into art journal pages. Each lesson also explains a different technique, step-by-step, through photos or an instructional video.  The techniques are consistent with the emotion.

Techniques include gel medium photo transfer, paper weaving, writing meaningful journaling, using paint on the page etc. Inspiration videos stuffed with art, layouts, quotes and music will help to get the ideas flowing and set the creative process in motion. The lessons also contain printable collage sheets with photos, quotes and images for you to use in your work. You are challenged to explore your inner self and take a step further in your creativity. This is your opportunity to learn new approaches to self-expression. Do you dare to explore your emotions?

“Mixed Emotions” includes:

  • 12 lessons with assignments in pdf format. Each lesson will focus on a specific emotion and an art technique that goes with it. Techniques will be clearly shown through photos or demonstrated on video. Both beginners and advanced art journalers will find pleasure in working with the lessons.
  • Access to inspirational videos to inspire you and help your creative juices flow.
  • Extra printable collage sheets with photos, illustrations and quotes to use in your work.
  • Access to a private group discussion forum where you may share, ask questions and interact with the teacher and other class participants. (Access will be activated a few days before the workshop starts or within 24 hours of payment.)
  • Access to group albums for posting your completed assignments and seeing what others have done. (Access will be activated a few days before the workshop starts or within 24 hours of payment.)
 
If you know me, you know that Emotion is a big part of all of my artwork!  This is especially true in my art journaling!  Mixed Emotions is a class that my friend Marit Barentsen and I developed and taught in 2010.  We packed alot of fun and creative play into the 12 lessons of the workshop.  We were really happy with the reviews we got the first time around, and we've decided to run it live again in February!!!  I hope you will join us for the fun!!!!!


Wednesday, October 31, 2012

BOD for Monday - 10/29/12...

Hi everyone!  I've got another Book of Days page to share with you today.  I didn't have a chance to take photos along the way this time, but I can still explain the layers for you.  There aren't as many as usual, cuz I didn't have tons of time to put into it....

I started out with a heavy coat of Color Shine spray ink in the following colors:  Mustard, Primrose, Georgia Peach, and Sweet Cherry...
 Note the difference between the left side of the page, and the far right where the diecut paper is.  The left side was gessoed first, which causes the ink to bead up.  The diecut piece is not gessoed so the ink soaks right in. 


 Here's the finished page...
I took a flat paintbrush and brushed the wet mist straight up from the bottom of the page; just enough to mix the colors a little.  I had to dry that layer with a heat gun for a few minutes to get all that ink to dry on top of the gesso. Next came the collage bits.  A mailing label from Papaya Arts, A magazine image of a galapagos island booby, a piece of vintage text, and the word "shapeshift" from a magazine. Then I added the label with the "new week" alphas on it, and doodled three flowers.  The flower petals are colored with prismacolor premiere pencils.  Finally, I wanted to make the two sides of the page blend, so I used the same blue neocolor II crayon on the text piece the booby is standing on, and the centers of the flowers.

At the end I added the journaling and doodling and I was done! 

In other news, I've got a secret and I can't wait to share!  I should be able to tell you tomorrow...

Monday, October 29, 2012

Friday's BOD - "Magic..."

Hey everyone!  I hope your weekend has been fabulous!  Before my new week starts, I want to share last Friday's Book of Days page with you!

Here's how it turned out...
I wanted to sum up how my first week of doing the Book of Days felt, and it really did feel like magic.

 Here's the step-by-step...

First step was a light coat of gesso...


Heavy body acrylic paint applied with a credit card...


Left over collage pieces from earlier in the week...


I gessoed through a Balzer Designs stencil (forgot to photograph - sorry), and then sprayed amethyst and tinsel Color Shine Mists over the top...


After rubbing the ink in, I added more acrylic paint over the top...

 More gesso...


for some reason the diagonal corner was bugging me, so I cut it off.  Now I wish I wouldn't have done that, but experimenting is what it's all about, right?  It will be a challenge to create on the spread behind (which you can now see peeking through), so that it isn't so distracting. Added collage bits, and then dark purple inktense pencil around the edges...

 And finished it with some details - a photo of Stevie Nicks, some rub-ons, stickers, and a postage stamp, and of course, journaling.  The title was written with white acrylic ink (my new favorite thing!)


I'm excited to start week two in my Book of Days!

Thanks so much for visiting my friends! I will see you again soon!

Sunday, October 28, 2012

The Reluctant Bumblebee...

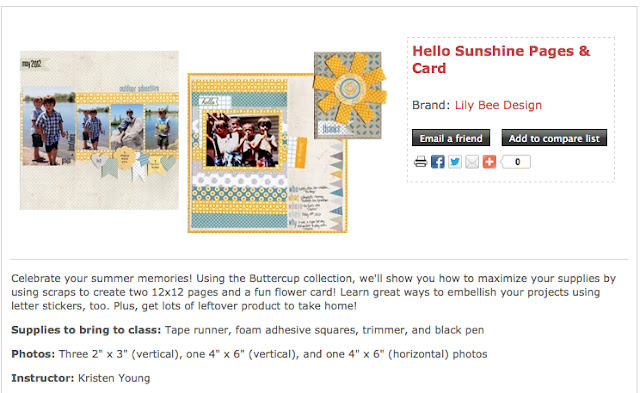
Today was my monthly crop with my girlfriends and we had a lot of fun!  I had time to finish another Scrapfest project from my Lily Bee workshop...

Here's the photo from the Scrapfest description.  The layout I finished today is the middle one...


and here's how mine turned out.  It's about my sister Renee's kindergarten bumblebee experience...


 I added the little bee using one of the Lily Bee paper buttons as his face.  The holes became the eyes, a little yellow cardstock for the body, and I doodled the rest.  I tried to make him look reluctant.  I made a flip-up for the journaling because I needed the extra room for the story.  The rest is below...


So, how cute is my sister as that bumblebee?!!!  I just love that photo!

I picked up a bunch of Simple Stories Sn@p! stuff for my 2013 Project Life album.  It's going to be hard to wait til then to use it!  Eek!

I hope you are having a super-fabulous weekend my friends!  Thanks so much for visiting!

Thursday, October 25, 2012

Book of Days "Love..."

Thanks for the feedback on my Book of Days pages!  I'm glad you like the step-by-step photos.  I will try to do more of those for you!  Here's one for my latest Book of Days journal page...

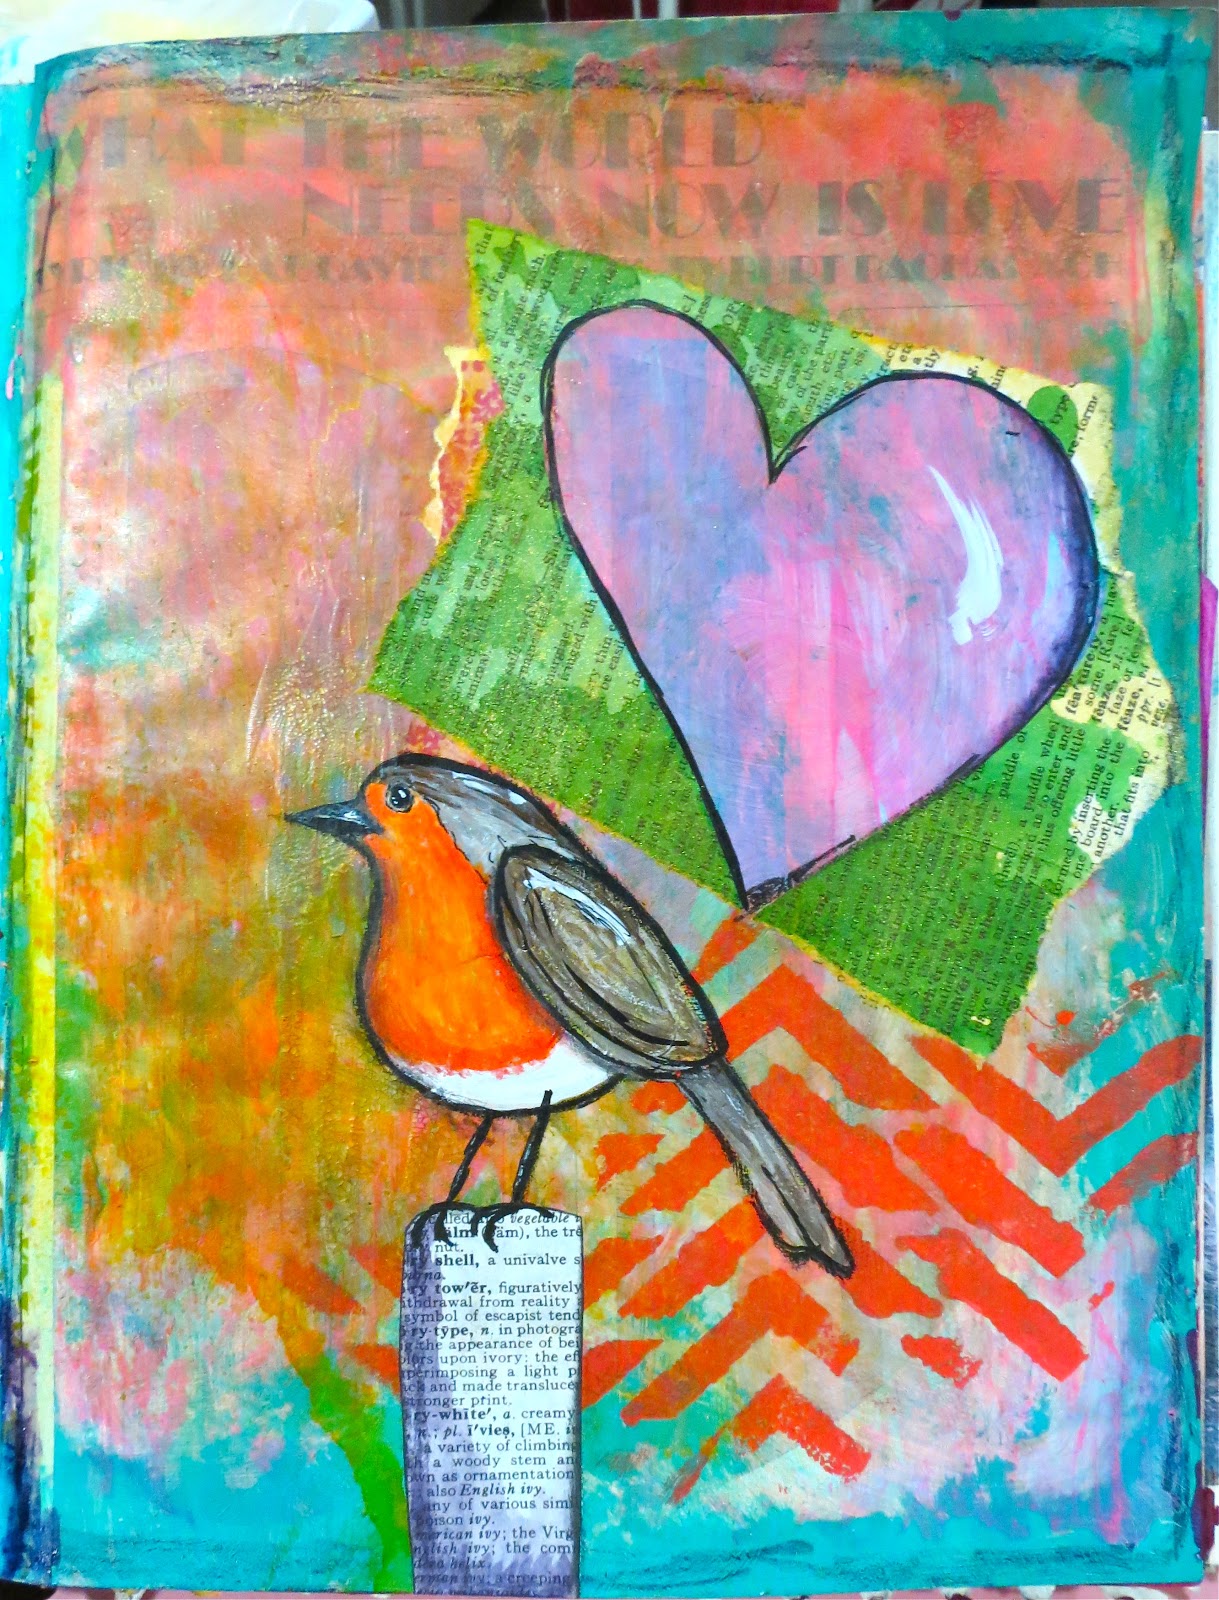
Here's the final page...

And here are the steps it took to get there...

The original base page is the sheet music for "What the World Needs Now is Love."  I added some hot pink craft paint, and added Tim Holtz Rock Candy Crackle Paint in a few places over the top of that. Then scrapbook paper; red acrylic paint through a Julie Balzer stencil, and turquoise paint over the top of that.  I wiped a bunch of the turquoise paint off so you could see some of the crackles.  Then added a little brown ink with a sponge to emphasize the crackles some more...  


I thought I'd add a heart to go with the "love" theme.  I cut one out of some misted dictionary paper, but discovered I liked the negative space better, so I stuck that on with a glue stick...


Then I covered the negative space up with the original heart, and sprayed some yellow ink over the top of the page...

This made me think of how I love birds, so I drew the basic shape of a bird with my china marker, and added a little stoop for him to stand on...


Started filling in the details of the bird with white acrylic ink, and grown and silver acrylic paint...


Filled in his belly with orange paint, then added some detail and shading with Inktense colored pencils and india ink...


 Added journaling for the day, and realized I wanted to write more than I had room for...


so I added a tag...

Cut the word Love out of that same dictionary paper that the heart was cut from and stuck that on the front of the tag with a glue stick.  And that brings us back to the finished page...

To learn more about the Book of Days project (or to start your own), click here to go to Effy Wild's Forum.

In my last post, Kelly asked about the origin of the phrase "It is well with my soul."  Thanks for the question Kelly!  All I know about the phrase is that the song is originally an old christian hymn.  There is a little bit of background in the description of the video here.  I only know about it because it's on my Jars of Clay album.  For me it's all about being at peace in your heart no matter what is going on around you.

I can't remember if I've mentioned that I signed up for the Life Book 2013 workshop?  Are any of you participating in that one?  It's a year long art journaling endeavor and it looks fantastic!  Tam Laporte (aka willowing) is coordinating the event, and she has her Life Book for this year posted on her blog this week. After seeing it, now I'm REALLY inspired!  Check it out here.

Also, we've extended the deadline for our current set of Scrapping The Music challenges, to accommodate this busy time of the year.  We'd really LOVE to have you play along with us!  Check it out here!

That's all for today folks! Let me know if you have questions!  Thanks so much for visiting and I will see you again soon!

Wednesday, October 24, 2012

BOD Post - "It is well with my Soul..."

Hi friends!  Just a quick post today to share my Book of Days page.  Just like yesterday, I let go of any preconceived notions about the end result of my page, and just enjoyed the process.

Here's how it turned out...


Gesso, acrylic paint, paper scraps, magazine image, pencil, marker and india ink.

Once again, a lyric popped into my head while doing my page, and became the title.  It's from "It is well with my Soul" (Jars of Clay version is the one I have - it's here).

I hope you are having a wonderful week!  Thanks for visiting and for your comments!

Tuesday, October 23, 2012

Book of Days...

I don't even know how I came across Effy Wild's "Book of Days" group.  It might have been when I was blog-hopping amongst the teachers' blogs for Lifebook 2013.  But somehow, I landed there, and fell in love with the idea of a "Book of Days!" 

I have been tinkering with developing an art journaling ritual for quite awhile now.  I do a lot of art journaling, but as you may known, it's kinda all over the place - in this book and that book.  What I really want is to have a process I can rely on.  Something separate from any "projects." Something that I do every day, naturally, just like brushing my teeth.  I started my Blue Velvet journal with this idea in mind, but I didn't get much past the first couple of pages.  

Effy Wild has an online community/forum that is free and she provides inspiration for the Book of Days (or BOD for short) process with weekly videos!  It's super cool!  Check it out here!

I was so inspired by what I was learning, that I decided to enroll in the "Book of Days Boot Camp" over the weekend, and obsessively completed the whole course!


 Effy's "Book of Days (or BOD for short) video for today was so inspiring!  I decided to follow the same steps that she took, but with my own supplies and style, and see what would happen.  I watched the video, and watched each layer she added, and then paused the video and added a similar layer. It was an awesome experiment because it forced me to let go of what the end product was going to look like and just trust the process! Here's how my page turned out...


Here are the steps it took to get there.  (Note: Each layer was dried with a heat gun before proceeding)...
 the page already had some collage and mist on it.  I added a layer of gesso


 modeling paste applied through a stencil...


 tons of mists over the top - Heidi Swapp's new "Color Shine" line in Georgia Peach, Sweet Cherry Red, and Tinsel...


 Added some OA Sprinklers in the new Woodland Park colors, and let them drip...


 Stenciling with Maya Mist and a Tim Holtz stencil...


 Drew the basic shape of a girl with a china marker...


 added some more details...


 started to fill her in with acrylic paint...


 finished filling in the details, and did some outlining with india ink and a brush...


 and the finished page - with journaling and a favorite lyric from Peter Himmelman. 

If you want to check out Effy Wild's Online community - click here! You can find out about the boot camp workshop here.

Thanks for visiting - I really appreciate it!  See you again soon!


Monday, October 22, 2012

Custom Notebook for only $2...

Hey there and Happy  Monday!  I just wanted to share with you a fun little deal I learned about through Lain Ehmann's blog.  For a limited time, you can get a custom notebook for only $2.00 from Inkgarden.com!  I did it, and I am ecstatic about how it came out - both the quality, and the vibrant colors of the printing!

Here's the one I did.  I just uploaded one of my scrapbook pages for the cover...


I filled in the extra space on the back cover with one of their premade patterns...

On the inside cover I chose another premade background, with a calendar overlay; and added a raven (of course!).  It was super simple!

I couldn't believe how easy it was and I just love my new little notebook!  The lined paper is good quality, and the size is about 5" x 7". 

The offer expires on November 2, so there is still time.  Click here to go to Lain's blog and check it out...!